CS-473 SPSOC
In CS-473 we perform several graded and non-graded practical works (PW’s). The basis for these PW’s is a Virtual Prototype (VP) loaded on the GECKO5Education. This VP is based on a dual-core OpenRISC system. The OpenRISC (OR1300) used is an at EPFL developed CPU that is ISA-compatible with the original OpenRISC, but with many extensions like software-configurable data- and instruction-caches, a NIOS2-compatible custom instruction interface, etc. The system is open-source and completely provided in Verilog.
Important
To be able to perform the PW’s you need to be able to program in c. This course does not provide teaching of the c-language.
All instructions given here were tested on Windows 11 for Windows native and Windows WSL; support for Windows 10 (or lower) will not be given as it is End Of Live (EOL) by the 14th of October 2025.
Required tools
To be able to perform the PW’s, some software must be installed on your computer. If you intend to use the machines in INF-3 or the VDI-infrastructure of EPFL you can continue with the next section about the VP. The tools required are (click on them to see the install-instructions):
UART (RS232/com port) development tool, this is used to upload your programs to the VP, and to see the responses of your VP.
OpenRISC cross-compile tool-chain, this is a patched version of a GNU-gcc compile tool-chain used to cross-compile your programs for your VP.
VSCode, an open-source AI code editor. Note: you do not require to install the TerosHDL plug-in for this course.
Important
It takes time to install these tools, so make sure that you have installed them before the first PW, as otherwise you do not have enough time!
Getting the virtual prototype (VP)
The VP used in the course is on github. To get it, open a terminal and change to the directory where you want to store the VP (e.g. in windows native cd Desktop). When you are in the correct directory, type in the terminal:
git clone -c core.symlinks=true https://github.com/EPFL-LAP/cs473.git
This should have created a directory (folder) called cs473, with sub-directories and files.
Important
In windows native this only works if you have correctly installed MSYS2!
In windows native you need to use a MSYS2-MSYS terminal.
In windows native you might get error messages like:
error: unable to create symlink virtualprototype/programs/helloWorld/support: No such file or directory
To solve this problem you have to:
cd cs473
git restore --source=HEAD :/
Note
The usage of \ and / in windows native with MSYS2 is confusing, if in doubt, use /, which is usual in unix (as all the commands provided here are MSYS2 unix commands).
Build-up of the VP-directories
In the directory (folder) cs473 you find the sub-directory (sub-folder) virtualprototype. The directory (folder) virtualprototype contains following sub-directories (sub-folders):
modules: this directory (folder) contains all the different modules of the VP described in Verilog and the corresponding documentation (in the doc-directory when given).
programs: this directory (folder) is where we are going to work in this course, it contains the programs to be executed on the VP. More details later on.
systems: this directory (folder) contains the top-level of the VP and the scripts used for the GECKO5Education.
In this course we are going to work in the directory (folder) programs. In this directory (folder) you find the sub-directories (sub-folders):
external: this directory (folder) contains a printf/sprintf implementation for embedded systems by Marco Paland. Many thanks to his contribution!
support: this directory (folder) contains the board support packages (BSP) for our VP.
helloWorld: this directory contains, well you guess :-)
bouncingBall: this directory contains the program bouncingBall that will light up a green ball moving diagonal over the RGB-LED-array and showing the x- and y-position in hexadecimal on the 7-segment display of the GECKO5Education loaded with the VP.
Each program directory (folder) contains following elements:
external: This is a symbolic link to the external directory above.
support: this is a symbolic link to the support directory above.
src: this directory contains the .c-files.
include: this directory contains the .h-files.
makefile: this is the makefile used to build the program.
Building your program
To build your program, there are two possibilities:
Using the command line:
open a terminal
go to the directory of the program you want to build, for example in windows native:
cd Desktop/cs473/virtualprototype/programs/helloWorld
type in the terminal:
make
Using Visual Studio Code:
open VSCode.
click on File->Open Folder.
browse to the folder of your program, for example: Desktop\cs473\virtualprototype\programs\.
click on helloWorld and afterwards on Open.
to build the program:
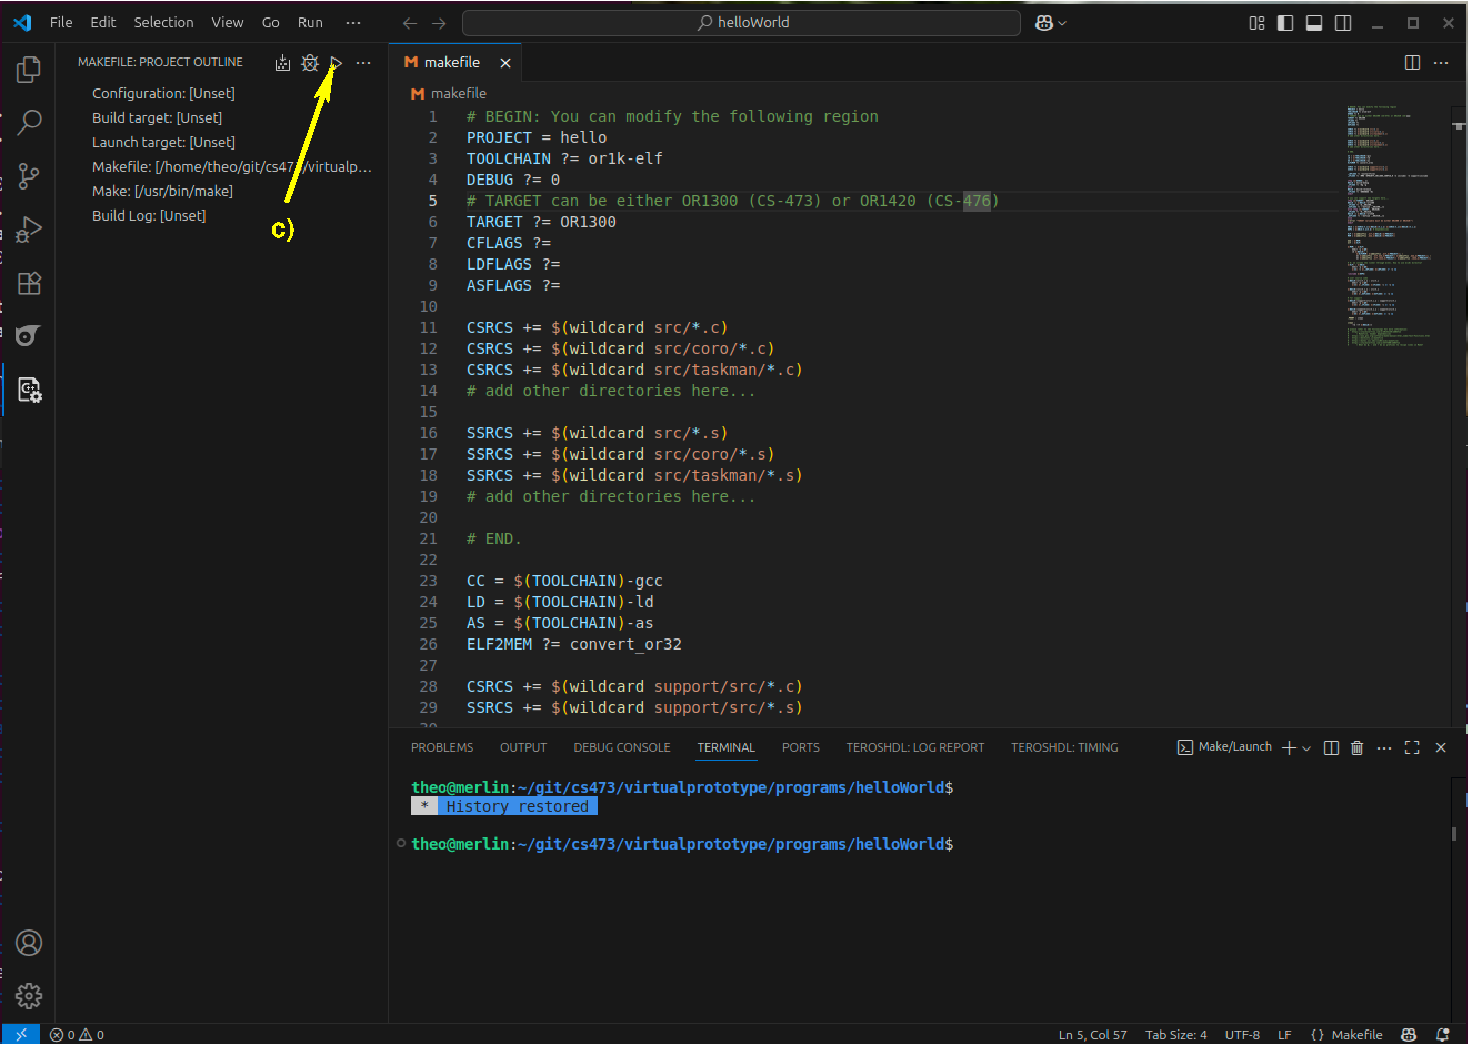
a) click on the makefile
b) click on the makefile extension
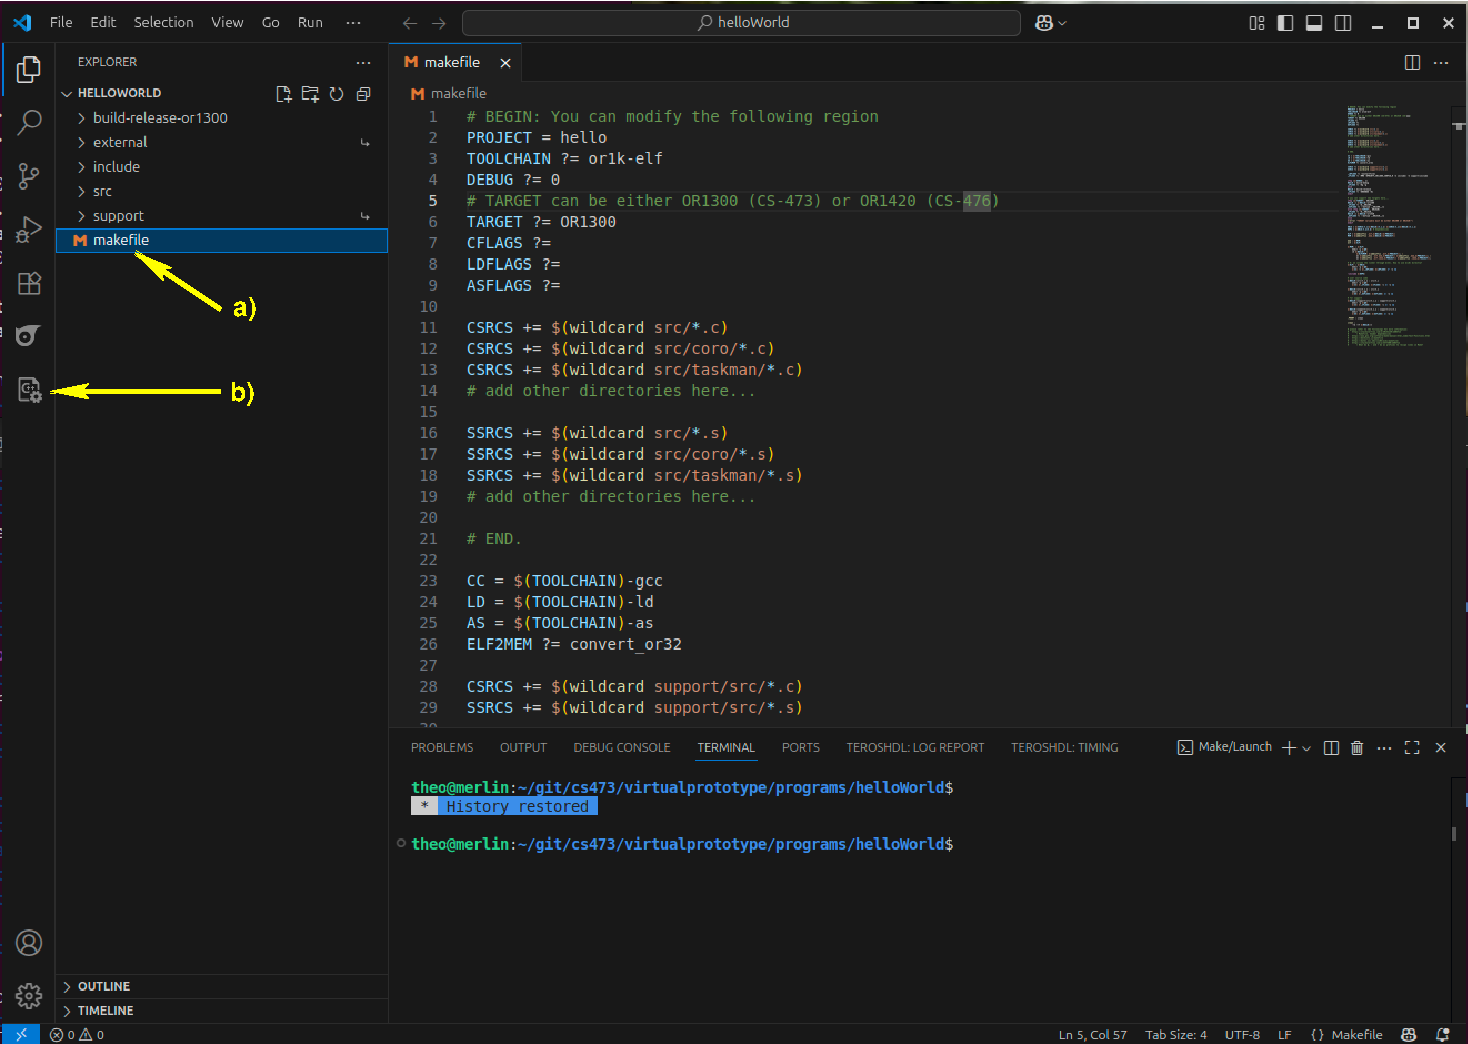
c) click on the run button
After having build your program you will have a directory (folder) called build-release-<TARGET>, where <TARGET> is the value of the TARGET parameter in the makefile (see above on line 6). In this directory you will find the files (note: <PROJECT> is the value of the PROJECT parameter on line 2 in the makefile):
<PROJECT>.elf: this is .elf-executable.
<PROJECT>.cmem: this is the compressed program that we are going to upload to the VP.
<PROJECT>.mem: this is a human readable version of the <PROJECT>.cmem-file.
Uploading and executing your program
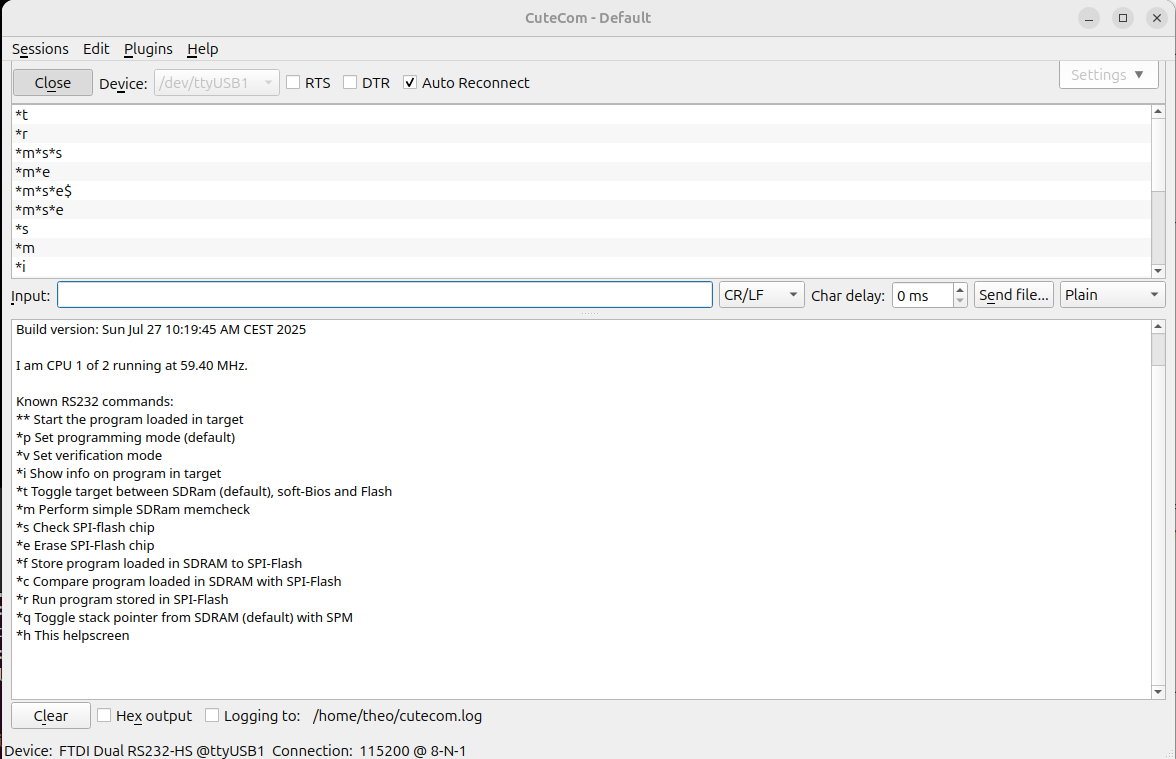
Connect the GECKO5Education and the HDMI-grabber to your computer. Open a webcam viewer to be able to view the HDMI-output of the GECKO5Education. A good webcam viewer program is webcamoid. Also open the UART terminal. Finally, press the User reset-button. The output of your webcam viewer should look like:

The output in your UART terminal-program should look like:
To Download and execute your program:
Click on the Send file… button.
Browse to the build-release-<TARGET> directory, for example Desktop\cs473\virtualprototype\programs\helloWorld\build-release-or1300.
Click on the <PROJECT>.cmem-file, for example hello.cmem.
Click on the Open-button.
Your program is now send to the VP. The moment the sending is done, you will see the message Download: done in your UART terminal-program.
You can now run the program by sending **-<enter> to your VP. The program will now run, and in case of the helloWorld program you should see:
Jumping to programm
Hello World!
My stacktop = 0x007FFFF4
To upload and execute another program, you can press the User reset-button, and start again by point 1.
Creating a new program
To create a new program, you can either use a file browser, or use a terminal and type (on all platforms):
cd Desktop/cs473/virtualprototype/programs/
mkdir myprogram
cd myprogram
cp ../helloWorld/makefile .
ln -s ../support .
ln -s ../external .
mkdir src
mkdir include
Of course you have in the first line account for the directory (folder) where you stored your VP.
Note
Do not forget to change the PROJECT parameter in the makefile, for example instead of hello you change it in myprogram.
You can now put your .c-files in the src-directory, and your .h-files in the include directory.
Creating a container to hand-in your PW
Some PW’s in this course are graded. The handing in is done on moodle. The files to hand in are:
pw2.pdf: Your report of the PW.
pw2.tgz: The container containing your program.
To make pw2.tgz open a terminal and type (all platforms):
cd Desktop/cs473/virtualprototype/programs/
tar -clvf pw2.tgz .
Of course you have in the first line account for the directory (folder) where you stored your VP.
Important
Before submitting the files on moodle, make sure that your program can be build.
State clearly in your report (pw2.pdf) where we can find your solution to the PW.